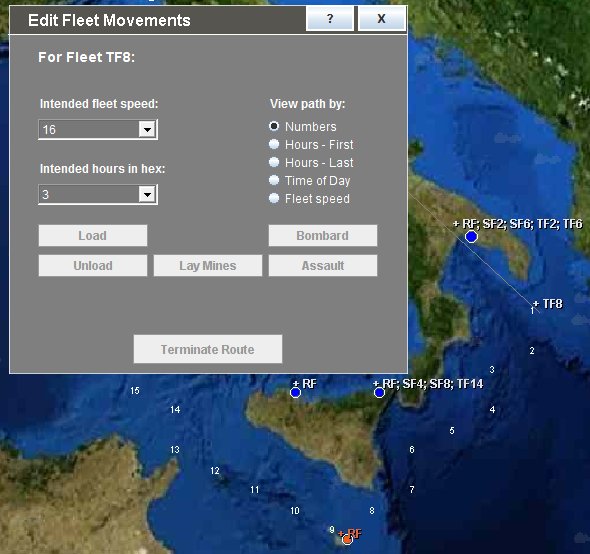
This help page describes how to use the Edit Fleet Movements dialog. An example of how the dialog may appear, from a Mediterranean campaign, is shown below:
If you are not at this dialog already and want to know how to bring it up, see editing fleet movement orders for background.
On the top bar is the '?' button, for bringing up this help page. The 'X' button or the 'q' hot key closes the dialog.
You can click and drag the dialog around if you want to.
The dialog tells you the name of the currently selected fleet:

The current route for the fleet will be shown as a numbered sequence of hexes.
Using the radio buttons on the right of the dialog you can see the route displayed in a number of other ways. These route display options are the same ones you have when setting up operational orders for the turn. 'Hours first' shows the hour that the fleet enters each hex; 'hours last' shows the hour it is to leave the hex; 'time of day' shows the am or pm time of day the fleet is to enter the hex, and 'fleet speed' shows the speed (in knots) of the fleet in each hex. (The 'fleet speed' option is new - introduced in v1.0.4.2)
Each time you select a different option, the route is re-displayed.
The dialog has a grey line pointer to the hex where editing is to start:
It is very important to be aware of where this pointer is pointing as it shows where any new path you enter will start.
When you first open the dialog, the pointer will point to the current location of the fleet. But as you add new sections of route, the pointer will shift, indicating were each new section is to start.
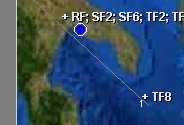
Shown below is an example. A new short path has been added that will take the fleet initially south and west of where it is currently ordered. The pointer has updated to point to the end of the new section:
Each section that is added must have a nominated fleet cruising speed and time in each hex.
Each section can have a different speed or time in hex, but the time in hex can never be less than the time necessary for the fleet to traverse the hex at the nominated speed.
The speed and hours in hex are set using these drop-down controls:
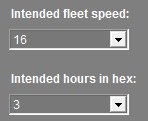
The maximum cruising speed can not be greater than the maximum possible for the fleet, given the ships in it and their condition.
When one or more sections have been added, the 'Undo' button will be enabled:

Each time you click this button, the last section you added will be removed.
When all new sections have been removed, the 'Undo' button will be disabled.
When you click on a friendly port hex, you will be given the option of berthing the fleet:
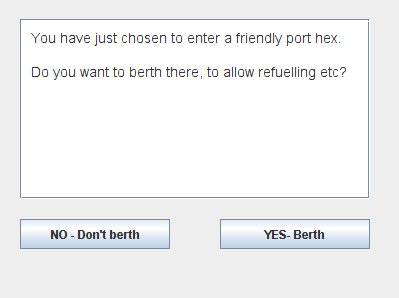
If you click 'NO - Don't berth', the fleet will stay in the port hex but outside of the actual port. If you click 'YES- Berth', the fleet will be given orders to sail in and berth. If the port has enough resources and docks infrastructure, the fleet can automatically start to refuel, rearm and repair when it gets there.
If you click on a hex that is already on the current route path, you will be given the option to replace the potentially redundant sections of the current route.
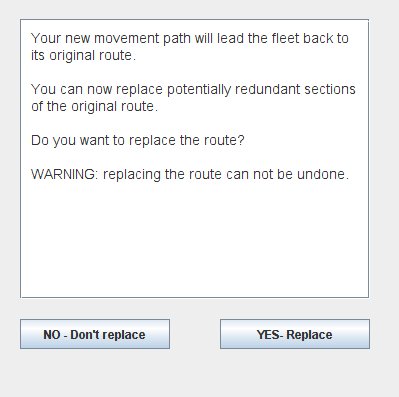
If you click 'NO - Don't replace', then the old route is left intact. If you click 'YES - Replace', the old route sections between were the fleet currently is and the most recently selected hex will be replaced by the newly aded section(s).
As the dialog says, a replace operation can not be undone, so make sure before doing this.
Adding sections can be done for various reasons. Sometimes, you may just want the fleet to temporarily divert somewhere. If the last section you create ends away from your existing route, this creates a gap in the route. This is OK - the AI automatically fills this in for you when you close the 'Edit Fleet Movements' dialog. But you need to be aware that in all such cases, the AI will return the fleet to its CURRENT location. Then, the fleet will resume its original route.
This also happens when you click on a hex that is on the existing route, and then select the 'NO- Don't replace' option. The fleet will automatically then sail back to it's current location, and then resume the original route.
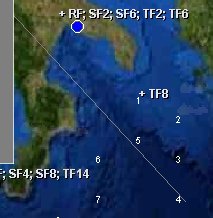
After at least one section has been added, the 'Terminate Route' button will be enabled:

Clicking this button will bring up a dialog asking for confirmation:
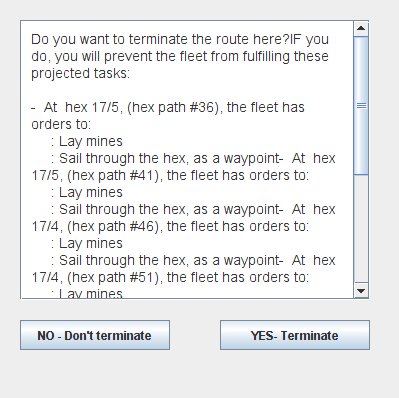
Terminating the route will erase all pre-existing fleet orders beyond that point. Often this will prevent the fleet from fulfilling some special tasks in its original orders, such as laying mines, bombarding, loading etc.
The picture above shows an example of this.
The dialog also warns you that a termination action, like a replace operation, cannot be undone, so make sure before you proceed to terminate a route.
Of course, you can re-create a whole new route and special orders for the fleet using the 'Edit Fleet Movements' dialog, so no irretrievable damage is done from inadvertent termination (or replace) operations; but it will require some editing work of you if you need to re-create any orders.
Note that, by default, any fleet for which you edit movement orders is automatically flagged as one you wish to control for tactical responses. This means that anytime your 2IC wants to give the fleet tactical response orders, you will be notifed, and can amend the new order if necessary.
You can close the dialog at any time by clicking the top-right 'X' button or the 'q' hot key.
A terminate action will also close the dialog automatically.
There are five buttons that allow you to give special orders for the fleet.
When a button is enabled and is pressed, the order applies to the fleet when it gets to the hex that the pointer is pointing to.
Each button is disabled by default, and is only enabled for clicking when the preconditions necessary for the order have been fulfilled.
The 'Load' button is enabled whenever the currently selected fleet is in one of your ports.
The computer checks the current troops, supplies and raw materials loaded on the fleet as at that hour, and lets you load up to the remaining capacity, but never more than the amount available at the port at that time.
Note that raw materials can only be loaded on merchant ships, and only at ports that have been specified as sources of raw materials when the campaign was created.
Clicking the 'Load' button brings up a sequence of screens - like a wizard - that steps you through the process of loading troops, supplies and raw materials. The screens are the same as those you will see when manually giving load orders to fleets during the deployment phase, prior to turn calculation. (See ordering cargo loading and unloading).
The 'Unload' button is enabled whenever the fleet is berthed in one of your ports and currently has troops, supplies or raw materials loaded, or it has already been given load orders during the current editing operation.
Clicking the 'Unload' button brings up a screen allowing you to specify the amounts to unload. This screen is the same as you wll see when manually giving fleet orders during the deployment phase, prior to turn calculation. (See ordering cargo loading and unloading).
The 'Lay Mines' button is enabled whenever the fleet is at sea, contains ships capable of minelaying (ie escort ships) and is steaming at 12 knots or less.
Clicking on 'Lay Mines' orders the fleet to lay mines in the hex that the pointer is pointing to.
The bombard button is enabled whenever the fleet is a non-submarine fleet and the hex the pointer is pointing to:
Clicking the 'Bombard' button orders the fleet to bombard the enemy port(s) in range, when it gets to the hex. The bombardment will be by guns if the fleet is adjacent to the port. If the fleet has carriers, aerial bombardment will also occur provided the fleet is in range at a time when one or more strikes can be launched.
The 'Assault' button is enabled whenever the fleet is currently carrying troops and the hex the pointer is pointing to is adjacent to an enemy port.
Clicking "Assault' will order the fleet to commence an amphibious assualt on the enemy port when it reaches the adjacent hex.