
Every hour during turn calculation, the AI calculates whenever any ship must leave the fleet it is in and depart immediately for the most suitable friendly base.
A ship must leave when it is:
If it is currently in a surface battle, this calculation is deferred until the end of the battle.
A ship is 'too' low on fuel when it has less than 10% of its maximum capacity remaining. Note that merchant ships are exempt from this calculation - they can never run out of fuel.
A ship is 'too' damaged when the total hull or superstructure damage or flooding exceeds a threshhold that is based on the orders of the ship and the fleet it is in. As an example, that threshhold would be 40% for a ship with cautious orders in a fleet with cautious orders. It would be 90% for a ship with agressive orders in a fleet with aggressive orders. It would be 20% for a ship with 'weak attack/withdraw' orders in a fleet with cautious orders. Ships with sacrificial attack orders are exempt from this calculation EXCEPT for battleships and carriers - which will always try to retire when damaged more than 80%, and cruisers - which will always try to retire when damaged more than 90%.
The calculation of a ship being 'too' low on ammunition is similar except that the amunition expenditure can be up to twice the damage level before a ship is considered too low on ammunition.
As is explained below, the basic rules force ships to depart whenever any of the triggers are met. But additional rules then operate to determine if any additional ships in the fleet should also leave at the same time, in order to accompany the departing ship(s).
These rules try to maintain an escort for the departing ships; and, if all of the more important ships in the fleet have left or are about to leave, then the computer will recommend that the whole fleet mission be cancelled and all ships return to port.
The AI assesses the suitability of all of your ports based on their closeness, and their capability to refuel, rearm and repair the ships that are leaving. (The capability depends not just on the resources currently there but also the level of dock infrastructure).
The AI selects what it regards as the most suitable port to return the ships to.
You can optionally change:
During turn calculation, you can click on the 'Options' button at any time. You will see a screen like this:
Near the bottom of the screen, make sure that the 'Control fleet returns to base' option is ticked.
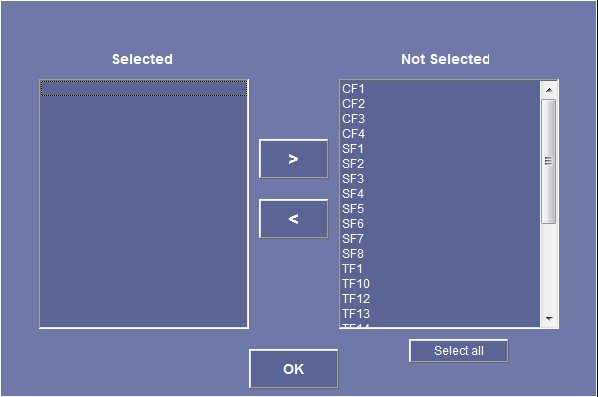
Then, edit the list of fleets for which you want control over their returning to base. Click on the 'Select fleets for control' button. You will see a screen like this:
 .
.
Use the controls to add to or subtract from the list of fleets you wish to control.
Note: this selection is the same list of fleets that apply to making fleet tactical decisions. (See selecting fleets for tactical responses.
(See tactical responses for more information).When the option is enabled (as just explained), the AI will alert you whenever any ships need to depart their fleet.
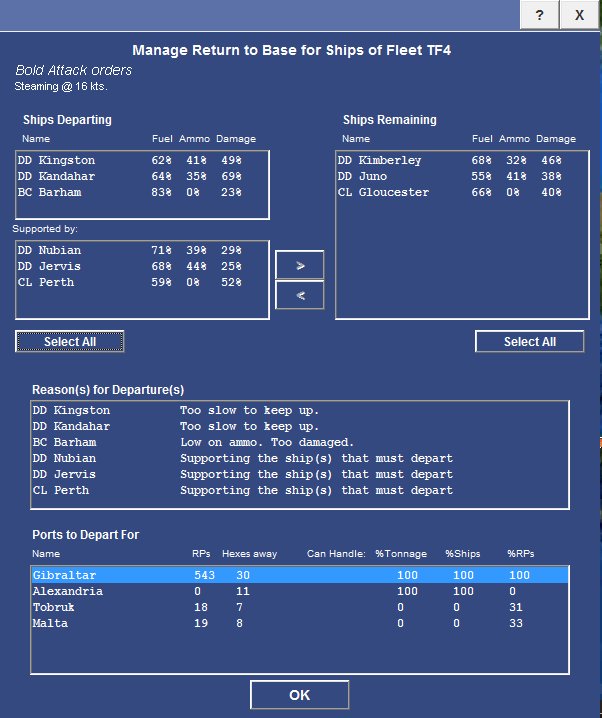
The calculation will be paused, and you will see a dialog window like this:
Use of this dialog is explained below.
The top section names the fleet, and summarises the fleet's current orders:

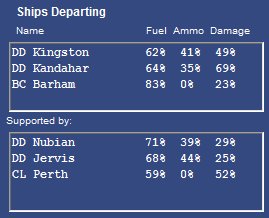
The top left of the dialog shows - in two lists - the ships that are about to depart from the fleet:
Ships that MUST go
The top list shows the ships that MUST depart - you have no choice. They are forced to depart because one or more of the basic rule triggers has come into play:
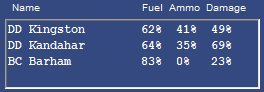
Each ship is listed with the current state of its fuel, ammunition and damage shown in percentage terms. You can quickly see from this what the problem is. But the reason for departure is also explained in the middle section of the dialog:
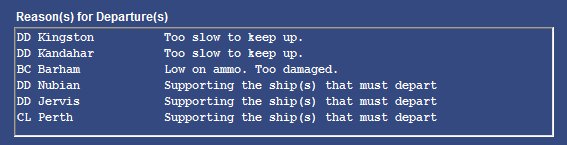
In the above example, the destroyers Kingston and Kandahar must leave because they are damaged and now too slow to keep up with the fleet, while the Battleship Barham is both too low on ammunition and too damaged.
Ships that SHOULD go
Any additional ships that the computer believes should also be released - to accompany that ships that should go - are also shown.
They are listed in the lower of the two 'Ships Departing' lists:
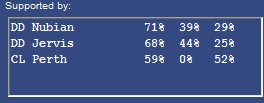
Ships will be listed here if:
When ships are added to support others forced to go, the reason is shown as 'supporting the ship(s) that must depart'.
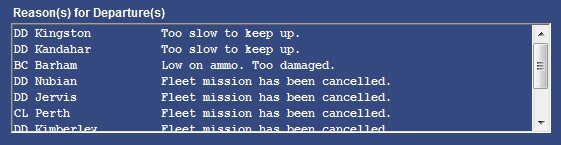
When the whole mission has been cancelled, this is also explained, as shown in this example:
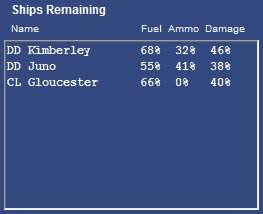
The ships remaining in the fleet (if any) are listed at the top right of the dialog:
All your current ports are listed in the bottom section of the dialog. They have been listed according to their suitability (as assessed by the AI), from those most suited at the top to those least suited lower down.
The AI automatically selects the topmost port in the list:
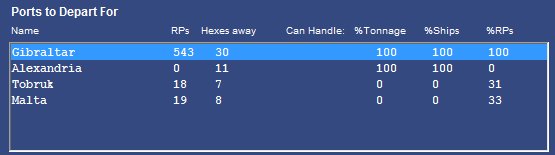
How the rating of suitability is done needs a little explanation.
Each port is rated according to:
The most favored port will be the port already on the movement path that can handle (and has the RPs for) the greatest proportion of the ships (by tonnage).
Note that some ports will show as being able to handle a high percentage of the ships yet have none or very low RPs. These ports are favoured over ports that have enough RPs but not sufficient infrastructure - for the simple reason that it is usually much quicker to acquire RPs at a port than to build infrastructure there.
By selecting one (or more) ships in the lower 'Ships Departing' or the 'Ships Remaining' lists, and clicking the '>' or '<' button as appropriate you can move the selected ship(s) between the lists.
You can quickly select all ships in a list by clicking the 'Select All' button underneath the list.
Remember though that you can not remove any ships from the 'Ships Departing' top list. These ships are the ones that MUST go, regardless.
As you make changes, the calculation of port suitabilities changes to reflect the new composition of the ships that are to leave.
Simply click in the 'Ports to Depart For' list to select any port if you do not like the selection made by the AI (which is always the top most port in the list).
When you have finished making any changes, close the dialog by clicking either the 'OK' button at the bottom, or the 'X' button at the top right of the dialog.
This help page is always available by clicking the '?' button at the top right of the dialog.