How to set rules of engagement
Rules of engagement ("RoE") tell a fleet what odds it should accept when facing an enemy fleet, and, in combination with each ship's orders, determines the aggressiveness of each ship in a surface battle - how much damage it will accept before retiring and how close to the enemy it will try to get.
In fleets set up by your 2IC, as part of the missions he creates, default RoE apply based on the mission type.
You can change these orders; and you can also set up orders for the fleets you create yourself.
Before discussing how to do this, it is important to provide a short overview of the types of orders you can give.
The fleet RoE determine the odds a fleet will accept in a surface battle. The odds are calculated based on the total naval tonnage for each side, but accounting also for known and suspected damage.
When a fleet meets an enemy that is too strong given its RoE it will flee before battle if it can, or escape from battle as soon as it can (unless the odds change favourably during battle).
Who has the sighting advantage is therefore important and depends on the weather conditions, relative size of the fleets, the sighting range of units (including aerial reconnaissance from float or carrier-borne aircraft), crew experience and, if radar is present, its quality. There is also a degree of luck involved. But a small highly trained raiding fleet with say a battlecruiser stands a good chance of being able to escape from a large enemy fleet, especially if it has better radar.
There are seven standard RoE for a fleet, plus the ability to create custom RoE. In order of aggressiveness, from most to least, they are:
- Sacrificial attack - to be reserved for fleets that are intended to fight to the last shell and torpedo against any odds. This is the default order for any mission involving submarine flotillas. (They are considered expendable, have special rules to determine if they can and should attack in a given situation, and can be attacked anyway only by ASW escorts (or patrolling aircraft). You could order it also for a fleet if you wanted to make a last, desperate "do-or-die" effort against a superior enemy, a last throw of the dice.
- Bold attack - the fleet will accept battle against an enemy not more than twice as strong. This is the default order for a number of 2IC-generated missions: some key offensive missions (bombardment, blockade, and combined ops (amphibious assault) - where you are walking into the lion's den and need to make the effort worthwhile, as well as the critical defensive missions (defensive patrol and ready reaction)- where you can not aford to let the enemy pass. It is also the default order for offensive patrols if your strategy is aggressive or very aggressive. You can also set it for any fleet you want if you are confident in the quality of your ships and crews.
- Cautious attack - the fleet will accept battle against a slightly superior enemy (up to 25% stronger). This is the default order for offensive patrol (for cautious strategies) and aerial bombardment missions. It is a good choice in any situation where you want to make a controlled offensive operation with relatively acceptable risk.
- Probing attack - the fleet will accept battle against an enemy not more than 80% as strong. In other words, the fleet needs to retain a small margin of superiority. This is not a default setting for any missions - it is in between "Hit and Run" RoE (which is the default order for some missions - see below) and "Cautious Attack". You may want to choose this for manually created raiding missions that are more than just hit and run affairs but where you still need to put self preservation first.
- Hit and Run - the fleet will accept battle against an enemy no more than two-thirds as strong. In other words, the fleet needs to retain a fair margin of superiority. This is the default order for 2IC-generated minelaying missions which will be composed of escorts only and which do not want to be diverted from their principal task to chase enemy fleets they sight. It is also the default order for offensive patrols when your strategy is very cautious. You may also want to set this for raiding missions where self preservation is unequivocally your highest priority and you are happy if the mission achieves no more than nuisance value. (Of course, you might nevertheless strike it lucky and come upon a lightly escorted fat juicy convoy or two..!)
- Reconnaissance - this is intended for fleets with a reconnaissance role only. The fleet will always try to avoid or disengage from battle. This is the default order for 2IC generated reconnaissance missions.
- Convoy escort - this is the default order for all 2IC-generated convoy missions and is a hybrid order - the fleet always attempts to avoid battle, but once in one, the naval ships act as though they have sacrifical attack orders - to allow the merchants to escape. Protection of merchant shipping is the highest duty of ecsorting naval vessels by default. If you do not accept this should be so - as evidenced by the Royal Navy in the famous convoy PQ17 - you can change the order for any convoy you (or your 2IC) sets up.
- Custom RoE - If these RoE are not quite what you want, you can select custom RoE and set some other odds, such as 1:2, 3:4, 1:1, 4:3, or 3:2 (expressed as a ratio of the enemy's strength to your's).
Overview of Ship Orders
Once in battle, each naval ship will fight until its orders indicate it should try to retire; and it will fight from a distance that also reflects its orders.
It is the combination of fleet and ship orders that determines ship behaviour.
There are four ship orders:
- Extremely aggressive - the default order for escort ships, which are more expendable, need to fight for as long as possible often in order to get into attack range, and are tasked to screen the larger, more valuable cruisers and capital ships.
- Aggressive - the default order for cruisers and submarines.
- Cautious - the default order for battleships.
- Timid - the default order for battlecruisers. (Note that the computer rates a capital ship as a battlecruiser based on its combination of speed, gun power and armour).
The fleet and ship order together determine the percentage of damage or ammunition loss a ship will accept before trying to retire. The more aggressive the combination, the higher the damage and ammunition loss that is acceptable. Also affected is the range the ship seeks to fight from. With cautious ship orders - such as battleships have by default - the ship will try to stay within its calculated immuity zone (if it has one) against the enemy it is currently targeting. More aggressive orders put higher priority on doing more damage, which means getting in closer, making more gun and torpedo hits but taking more punishment as well. With timid orders the ship will stay at the outer end of its maximum attack range, scoring less hits but also with reduced chance of hits from the enemy.
Note that carriers and merchant ships ALWAYS try to flee from a surface battle as quickly as possible.
The exact percentages of damage and ammunition loss are shown in the RoE Editor - which is explained shortly.
An example
Before discussing how you use the RoE Editor, an example may help illustrate how RoE work:
- If you wanted to set up a classic raiding fleet, say of a Battlecruiser, heavy cruiser and a few escorts, you would probably give the fleet "Probing Attack" or "Hit and Run" fleet orders. The Battlecruiser would probably have "Cautious" or even "Timid" ship orders, the heavy cruiser would be one step less cautious (say with "Cautious" or "Aggressive" ship orders), and the escorts would probably have at least "Aggressive" and probably "Very aggressive" ship orders so that they can shield the bigger ships, allowing them to escape if necessary.
The Theatre Map
To edit RoE for a fleet and the ships in it, you first need to access the theatre map. (See accessing the theatre map).
The theatre map for the Pacific will look smething like this:
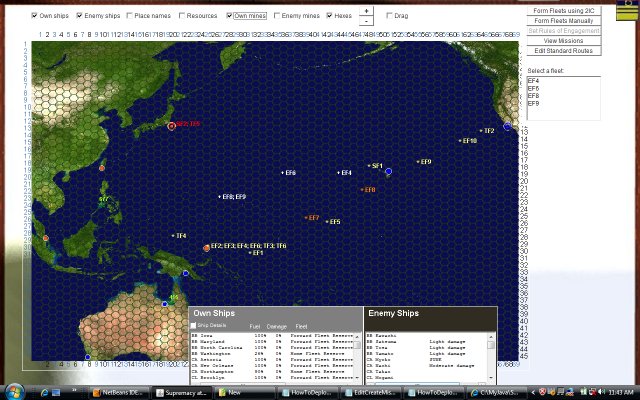
Now, from the fleet list to the right side of the map, select the fleet you want to edit. Illustrated below is the selection of fleet "TF2"

You will notice that when a fleet is selected, several pieces of information are displayed:
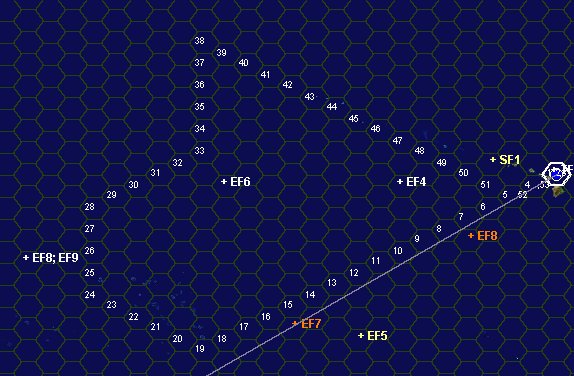
- The hex path for the fleet (if there is one) is displayed on the map, numbered in the order through which the fleet will travel.
- A information box for the fleet appears at the lower left of the screen:
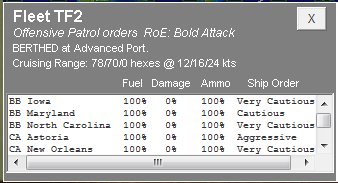
It tells you what the mission orders and current fleet RoE are, and for every ship, its fuel, damage, ammunition status and current ship order.
Use this information to determine if you need to edit the RoE.
The RoE Editor
Assuming you do want to edit the RoE, just click on the "Set Rules of Engagement" button to the top right of the theatre map:

This brings up the RoE Editor, which looks like this:
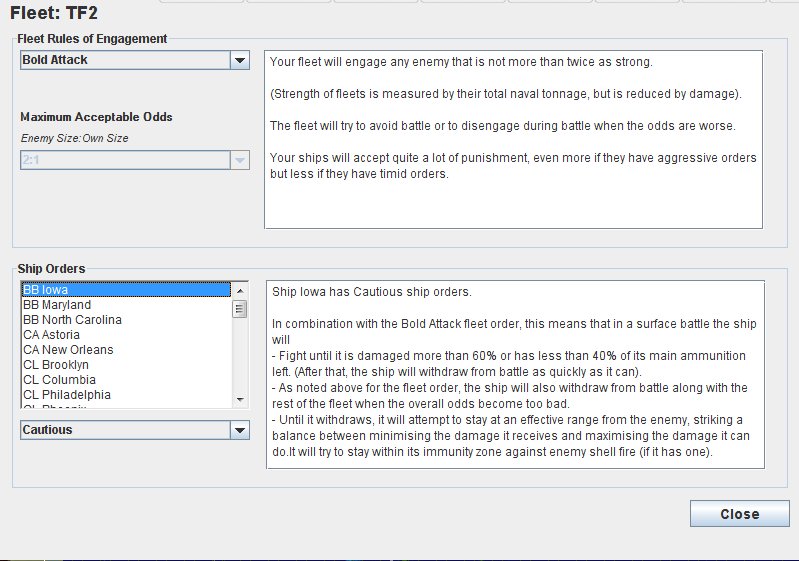
The RoEEditor lets you set any of the seven standard RoE for a fleet,as well as selecting custom RoE. It also lets you change ship orders for any ships.
Two text boxes give a clear explanation of how the current RoE and ship orders will affect fleet and ship behaviours in a surface battle.
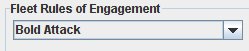
To change the fleet RoE, simply select a different one from the "Fleet Rules of Engagement" combo box:
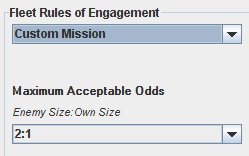
If you select "Custom Mission", the "Maximum Acceptable Odds" combo box will become enabled, allowing you to set your own odds:
As you change the RoE, the text will update in both text windows. Review the text to make sure you are happy with the change.
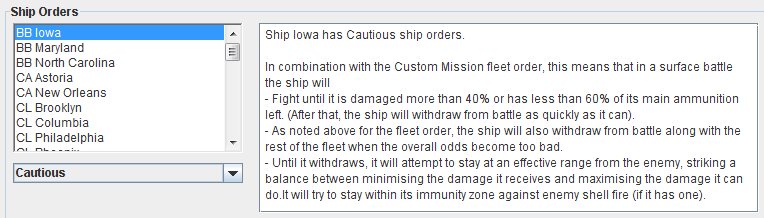
Changing ship orders is just as easy. Simply select a ship in the "Ship Orders" section:
Then, select a different ship order from the combo box. The picture below shows the Iowa now with aggressive orders. The effect of this new order is clearly explained in the accompanying text window:
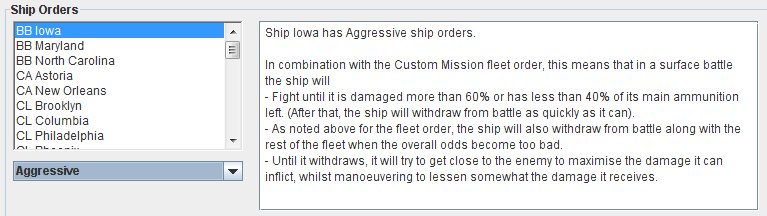
You can see that with the new, more aggressive order, the ship will accept more damage and fight from closer in instead of staying necessarily within its own immunity zone.
When you are happy with the fleet RoE and ship orders, just close the RoE Editor by clicking the "Close" button at the bottom of the screen. Ths returns you to the theatre map.
You can relaunch the RoE Editor any number of times, and change the orders whenever you want. It is only the last set of orders you give that takes effect at run time.